Food Coloring Techniques: Color Easter Eggs With Food Coloring

Color easter eggs with food coloring – Dyeing Easter eggs is a vibrant tradition, a testament to creativity and the joy of spring. The beauty of the final product hinges greatly on the technique employed. Understanding different methods and their nuances allows for greater control over the final aesthetic, enabling you to achieve precisely the look you envision. This section explores various approaches to coloring eggs, detailing their unique characteristics and providing step-by-step instructions for successful execution.
Comparison of Egg Dyeing Methods
Choosing the right method depends on your desired outcome, available materials, and time constraints. Each technique offers a distinct visual effect and level of complexity. The following table provides a comparative overview of four popular methods: immersion dyeing, spray dyeing, marbleizing, and tie-dye.
| Method | Materials Needed | Time Commitment | Difficulty Level |
|---|---|---|---|
| Immersion Dyeing | Hard-boiled eggs, food coloring (liquid or gel), vinegar, bowls or cups | 15-30 minutes (plus drying time) | Easy |
| Spray Dyeing | Hard-boiled eggs, spray bottles, food coloring (liquid), water | 15-20 minutes (plus drying time) | Easy to Moderate |
| Marbleizing | Hard-boiled eggs, food coloring (liquid), oil, water, bowls | 20-30 minutes (plus drying time) | Moderate |
| Tie-Dye | Hard-boiled eggs, rubber bands, food coloring (liquid or gel), vinegar, bowls | 30-60 minutes (plus drying time) | Moderate to Difficult |
Immersion Dyeing
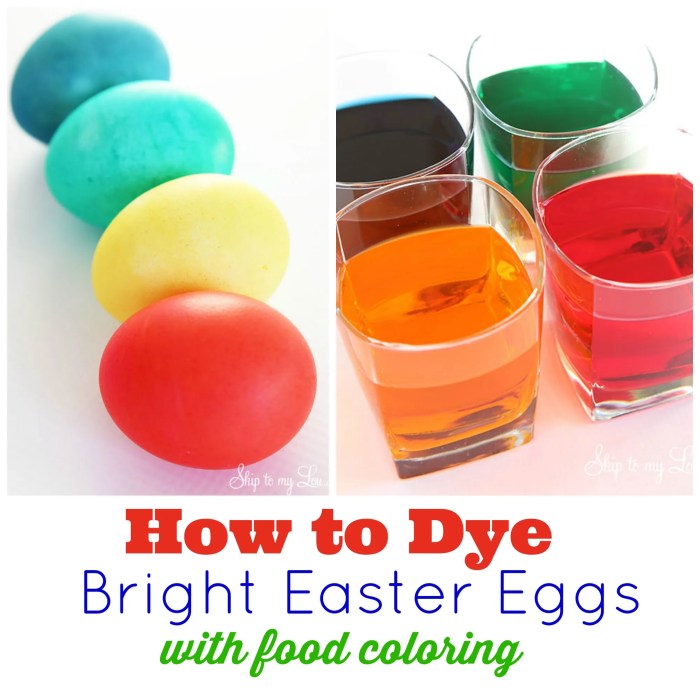
Immersion dyeing is the simplest and most common method. It involves submerging eggs in colored dye baths to achieve solid, even colors. The depth of color can be controlled by the concentration of the dye and the duration of immersion.
- Prepare dye baths: Mix food coloring with water and a small amount of vinegar in separate bowls. The vinegar helps set the color and prevents bleeding. Experiment with different ratios of dye to water to achieve varied shades. For example, a small amount of dye will produce a pastel shade, while a larger amount will create a bolder hue.
- Submerge eggs: Carefully place eggs into the dye baths. Ensure the eggs are fully submerged for even coloring.
- Adjust immersion time: The longer the eggs remain in the dye, the deeper the color will be. Check periodically to monitor the color intensity.
- Remove and dry: Gently remove the eggs and place them on a wire rack or paper towel to dry. Allow ample drying time before handling.
Spray Dyeing
Spray dyeing offers a unique approach, allowing for greater control over color placement and intensity. It’s particularly useful for creating subtle gradients or speckled effects.
- Prepare spray bottles: Dilute food coloring with water in separate spray bottles. Adjust the water-to-dye ratio to control the intensity of the spray.
- Spray the eggs: Hold the eggs at a distance and spray lightly. Multiple thin coats are better than one heavy coat to prevent blotches. Experiment with different angles and distances to create unique effects.
- Layer colors: Allow each coat to dry slightly before applying another color for layered effects.
- Dry thoroughly: Allow eggs to dry completely before handling.
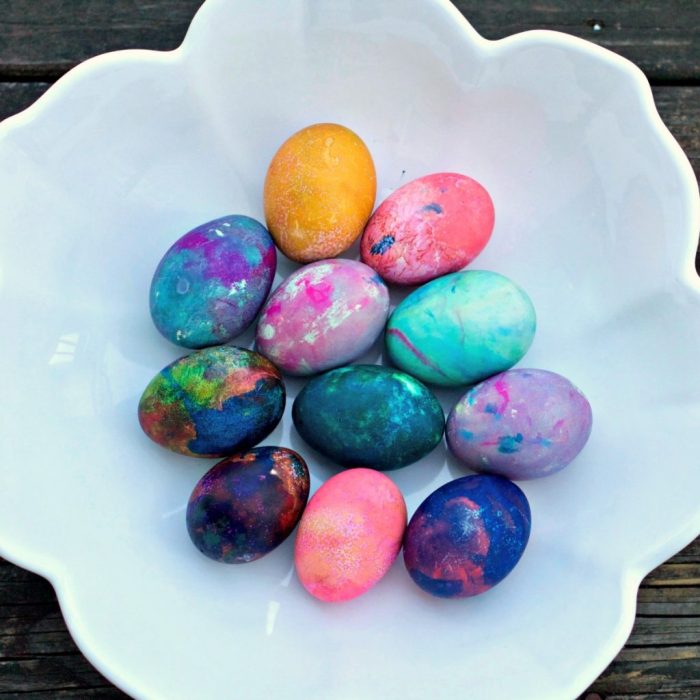
Marbleizing, Color easter eggs with food coloring
Marbleizing creates a swirled, marbled effect by using oil to repel the dye, creating unique patterns. This technique adds an artistic flair to your Easter eggs.
Dyeing Easter eggs with food coloring is a fun and simple activity, offering a wide range of vibrant hues. For particularly intense and glossy colors, consider using food coloring specifically designed for candy applications, like those you might find detailed at candy apple food coloring websites. This approach can lead to truly stunning results, making your Easter eggs even more eye-catching and memorable.
- Prepare the dye baths: Mix food coloring with water in separate bowls. Add a few drops of oil to each bowl.
- Swirl the colors: Gently swirl the oil and water together to create a marbled effect. The oil will prevent the colors from fully mixing, resulting in a unique pattern.
- Dip the eggs: Gently roll the eggs in the dye bath, allowing the colors to adhere to the surface. The oil will repel some of the dye, creating a marbled pattern.
- Dry thoroughly: Allow eggs to dry completely before handling.
Tie-Dye
Tie-dye involves using rubber bands to create sections on the egg, resulting in a segmented, tie-dye effect. This is a more involved method but yields a visually striking outcome.
- Prepare the eggs: Secure rubber bands around the eggs to create sections. Experiment with different patterns and arrangements of rubber bands.
- Prepare dye baths: Mix food coloring with water and vinegar in separate bowls.
- Dye the eggs: Submerge the banded eggs in the dye baths. The rubber bands will prevent the dye from reaching certain areas, resulting in a tie-dye effect.
- Remove and dry: Carefully remove the rubber bands once the desired color intensity is achieved. Allow eggs to dry completely before handling.
Types of Food Coloring and Their Effects
The type of food coloring used significantly impacts the final color and intensity. Liquid food coloring is readily available and easy to use, but often requires more dilution. Gel food coloring offers more concentrated color and vibrant hues. Powdered food coloring provides intense color, but needs careful mixing to avoid lumps. Experimentation is key to finding the perfect color and consistency for your desired effect.
For instance, using gel food coloring can lead to bolder, richer colors compared to liquid food coloring, even with the same dye concentration.
Preserving Dyed Eggs

Keeping your beautifully dyed Easter eggs vibrant and intact for as long as possible is a testament to your craft and a joy to behold. Proper preservation techniques prevent cracking, fading, and the growth of unwanted bacteria, allowing you to enjoy your creations for days, even weeks. Let’s explore some effective methods.
Refrigeration
Refrigeration is the most common and effective method for preserving dyed eggs. The cool temperature slows down bacterial growth and prevents the eggs from spoiling quickly. Simply place your dyed eggs in a carton or container in your refrigerator. This method is simple, readily available, and highly effective in maintaining both the integrity and the vibrancy of your dyed eggs for at least a week, sometimes longer depending on the dye used and the egg’s freshness before dyeing.
However, it’s important to note that even refrigeration won’t indefinitely preserve the eggs; the shell’s natural porosity will eventually allow for some moisture loss and potential color fading over time.
Adding a Preservative Coating
Applying a thin layer of mineral oil or a commercial egg preservative spray can create a protective barrier, further extending the lifespan of your dyed eggs. These coatings seal the pores of the eggshell, minimizing moisture loss and preventing premature cracking. Mineral oil, for instance, creates a subtle sheen while preserving the color’s vibrancy. The use of a commercial spray can offer even better protection against moisture loss and cracking.
However, remember that any added coating may slightly alter the eggs’ appearance and could impact their edibility if not properly chosen and applied. Always opt for food-grade mineral oil and follow the instructions on any commercial egg preservative spray.
Storage Considerations
Proper storage is key to preserving your dyed eggs. Avoid storing them in direct sunlight, as this can cause the colors to fade quickly. Similarly, keep them away from strong odors that might permeate the shell. A cool, dark, and dry place, such as a refrigerator’s egg carton, is ideal. Avoid stacking the eggs too high, as this can cause cracking.
Gentle handling is essential to maintain their structural integrity. Regularly check your eggs for any signs of spoilage, such as cracks or unpleasant odors, and discard any that show signs of deterioration.
Question & Answer Hub
Can I use old eggs?
Nah, mate. Use fresh eggs – they’re stronger and less likely to crack. Old eggs are a recipe for disaster.
How long do the colours last?
Depends on how you store ’em. Proper storage can keep your eggs looking fly for weeks. Check out the preservation section for tips.
What if my eggs crack?
Don’t panic! It happens. Gentle handling and adding a bit of vinegar to the dye bath can help. Check the troubleshooting section for more info.
Are food colorings safe for kids?
Always supervise kids, use food-grade dyes, and wash hands thoroughly afterwards. Check the packaging for allergy info.
